Video tutorial for beginner only on how to make realistic logo on leather using existing Photoshop Mockup Template easily less than 5 minutes. Below is step by step to do:
- Open www.google.com and find the PSD mockup using keyword: "Leather Logo Mockup" then choose the image you like by clicking it.
- Choose the image by clicking it then open the appropriate site containing the image (http://www.graphicsfuel.com)
- Before using that you should first read the License page.
- Click "Download Leather Logo Mockup" button to download this PSD mockup 4. Open Photoshop program then open PSD logo mockup file you've downloaded
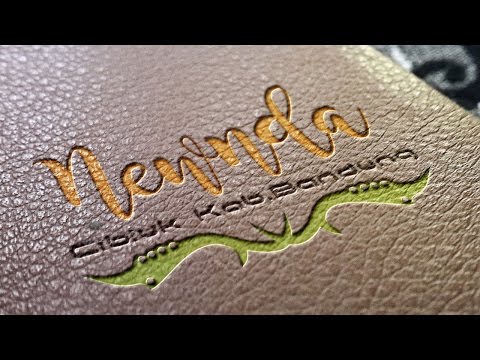
- Open your existing logo. Here I use Logo "Newnda" with transparen background. Transparent PNG image would be better.
- Double click a little box on "YOUR LOGO HERE" layer to edit and change the existing logo
- Drag your new logo to previous window ("Shape 1.psd window" )
- Remove, delete or hide this layer (layer 27) that contains old logo then adjust the size of your new logo based on PSD mockup template size
- Close recent window then click "YES" button to save it
- Open first window (Leather-stamping-logo-mockup.psd). Tada.... You'll see your new logo in the leather PSD mockuplike a real 3D logo
- Repeat previous step if you want to edit this mockup such as size, position, or change the image
- Now you can save your artwork in any image file formats (JPG, GIF, PNG) by choosing "Save for web in menu File or by pressing A"T+SHIFT+CTRL+S
- Finally you can check your image file you've saved by opening it using Windows Explorer
Comments
Post a Comment